Easy method for making unstrained “quick whey” without the time and hassle of separating cultured milk. This approach is perfect for obtaining a culturing starter in a hurry for a single fermented food or beverage recipe.

Without a doubt, one of the most important tools for home fermentation is raw whey. This syrupy, probiotic-rich liquid serves as an inexpensive and highly effective starter for all manner of homemade fermented foods as well as delicious cultured beverages.
While there are ways to culture foods without whey, it is definitely easier and less expensive to use it!
So, unless you have a dairy allergy, I recommend incorporating regular whey-making into your traditionally-inspired culinary routine.
Strained Whey
The method I typically recommend for making whey is to strain the liquid from clabber. You will get the most whey using this approach.
Since whey lasts for many months refrigerated, you will usually use it all up before needing to toss it. It makes great garden fertilizer too, by the way (really brings in the worms).
Another method is to strain whey from a quart of whole milk yogurt. Note, it should ideally be regular yogurt, but in a pinch, even already strained Greek yogurt works.
Easy, No-Straining Method
Unstrained quick whey is the perfect method to use if you are new to fermentation and want to “try it out” without the time and effort of straining a large amount that you may not end up using.
This approach also works well if you are unexpectedly out of liquid whey and need some fast for an impromptu recipe.
In these situations, you can obtain a few tablespoons quickly and easily from store yogurt to make a single recipe.
This tip comes from Donna M. who gave permission for me to publish her awesome, very helpful hack for this article!
Start with Yogurt
Simply buy a quart of good quality, full-fat yogurt from the store. Here are guidelines on how to identify the best yogurt brands that are worthy of your food dollar. My favorites that are available in my community include:
- Maple Hill
- Seven Stars
- Bulgarian Yogurt
Note that you can also use homemade 24-hour yogurt. Kefir is not ideal here because it is too liquid-y.
Scoop Out One or Two Servings
Once you have a quart of homemade or good quality store yogurt to work with, proceed to the next step.
Scoop out a small serving or two of yogurt from the middle of the container and eat it.
Then, put the container back into the refrigerator and leave it for a few hours or overnight to re-settle.
Remove Liquid Whey with a Spoon
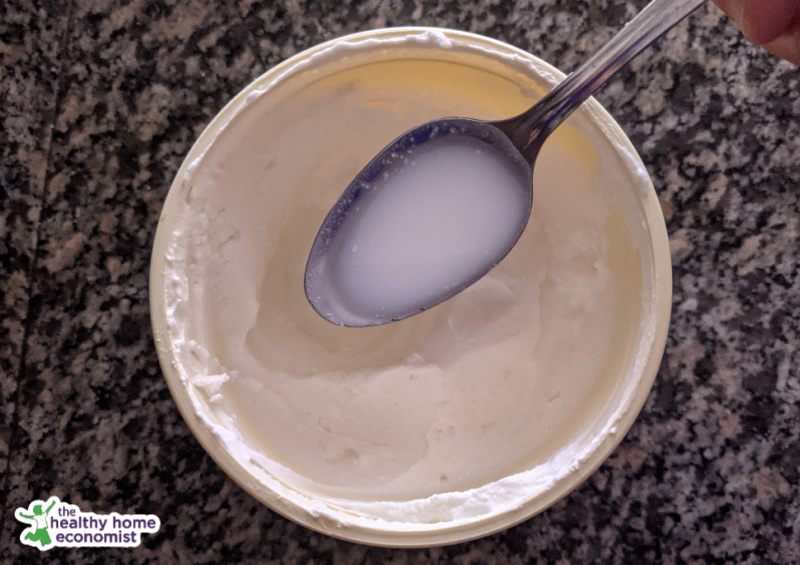
Once this short amount of time has passed, open the lid of the container and notice that clear liquid has formed in the hole where you scooped out the yogurt.
This is liquid whey! Gently remove the 1-2 tablespoons with a large spoon or small ladle.
The whey will be cloudy compared to strained, but it will still work fine for recipes. Note the picture above to get a rough idea.
This whey can be immediately used to ferment the recipe of your choice.
Ideal for Single Recipe Use
In sum, if you’d like to dip your toe in the waters of homemade fermented foods, making quick whey is a good approach to get you started with minimal effort.
Once you experience the amazing health benefits of incorporating traditionally cultured dishes into your home menu, you will hopefully graduate to straining whey on a regular basis so that you have plenty in the refrigerator at a moment’s notice.


This looks delish! Thanks for sharing this Sarah ; )
Kim, Owner & Creator of Do It Yourself PT.